<-!->

Home About Beauty Fashion Lifestyle Shop Image Map

Saturday, December 12, 2015

Advent Calendars Day 5 & 6

Blogmas Day 12


In my Benefit Advent Calendar on days 5 and 6 I got a sample size of the They're Real mascara and I can now see why people are so obsessed with it. I like that it has the spikes on the end of the brush because it makes it easy to get the lashes on the inner corners and the outsides coated and overall it makes my lashes long, but not clumpy. I even had someone at work ask me if they were my real lashes the first day I wore this! 

Day 6 of the Benefit calendar I got a Lollitint Lip and Cheek Stain, which I haven't tried other than swatching, but the color is really pretty. It's also definitely a stain because it won't come off of my hand, so I think it'll be great worn sheer for work because I'll be left with a hint of color even after it wears off.

In the Tanya Burr calendar on Day 5 I got a set of lashes with glue. I was pretty excited about this because I'm not really a lash wearer, but it'll be nice to have them if I ever want to wear them for something. They look really pretty and natural, so I'm sure I'll be using these at some point.

Lastly, on Day 6 of the Tanya Burr calendar I got a gorgeous lipgloss in the color Bewitching. It's such a pretty wine color with very subtle iridescent sparkles throughout that I cannot wait to wear!

Also, I wanted to mention that this is the last "Blogmas" post I'm going to do. I decided to stop at day 12 and just think of it as "The 12 Days of Blogmas" because it's really difficult to post every single day and I don't feel like all of my posts have been up to my standards. I still plan on posting every other day for the rest of December, but I'm not going to stress about it. I hope you've enjoyed it and continue to enjoy!

Instagram Twitter Pinterest Google+ Image Map

Friday, December 11, 2015

My Gift Wrap Theme for 2015

Blogmas Day 11

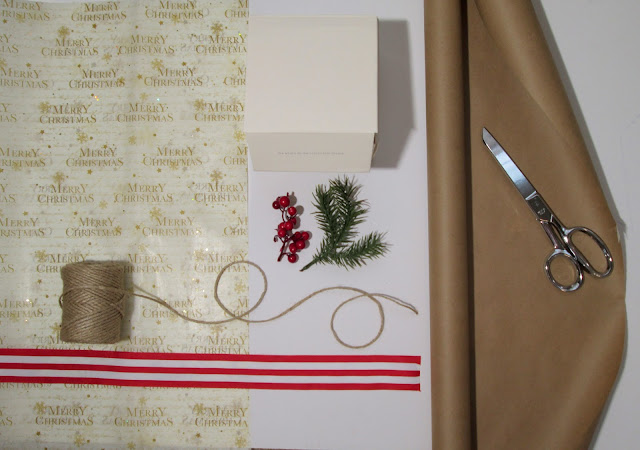
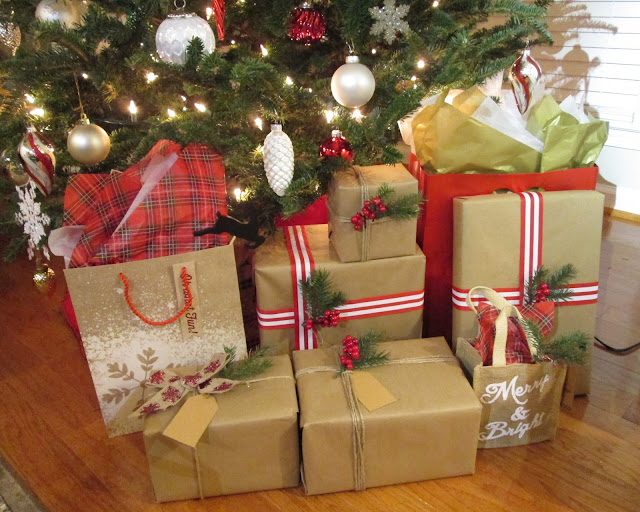
I decided to do a Christmas gift wrap theme again this year because I enjoyed it last year. For this year I decided to use brown wrapping paper usually used for shipping, red and white striped ribbon, burlap ribbon, twine and then accessorize them with pieces of tree sprigs and berries. This rustic style has never been my style, but I just really wanted to give it a try and see how I liked it!

Gift wrap theme with tree sprigs, striped ribbon, berries, twine and brown paper

Gift wrap theme with tree sprigs, striped ribbon, berries, twine, gift box and brown paper


Christmas gift wrapping with tree sprigs, striped ribbon, berries, twine and brown paper

Wrapped Christmas gifts with tree sprigs, striped ribbon, berries, twine and brown paper

Wrapped Christmas gifts with tree sprigs, striped ribbon, berries, twine and brown paper. Rustic Chic

Wrapped Christmas gifts with tree sprigs, striped ribbon, berries, twine, plaid tissue paper and brown paper

Wrapped Christmas gifts with tree sprigs, striped ribbon, berries, twine and brown paper

Wrapped Christmas gifts with tree sprigs, striped ribbon, berries, twine, plaid tissue paper and brown paper

 It took a while because I had to hot glue everything down, but I'm really happy with the way they turned out. I also love the plaid tissue paper, probably my favorite ever!


What do you guys think?? Do you do gift wrap "themes"?
Instagram Twitter Pinterest Google+ Image Map

Thursday, December 10, 2015

Estee Lauder Double Wear Foundation

Blogmas Day 10

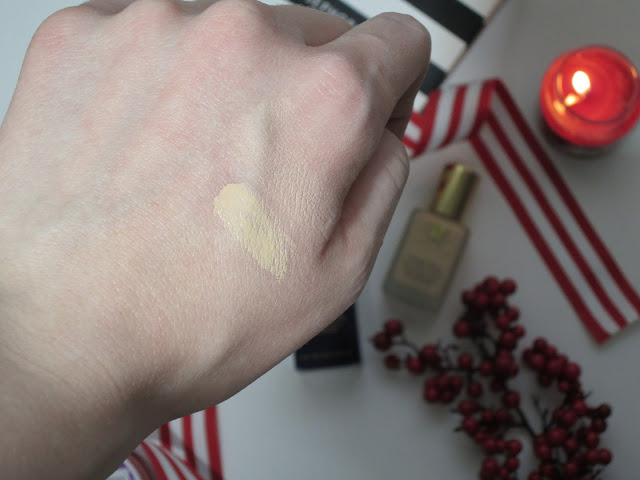
Review of Estee Lauder Double Wear Foundation

Review of Estee Lauder Double Wear Foundation


A few weeks ago I decided to treat myself to a new foundation. I always repurchase Revlon Colorstay, which I love, but I thought that for my birthday and the holidays I'd try one that I've wanted to try for so long. As you can see, it's Estee Lauder's Double Wear- the original. I'm in the shade Ivory Nude and it matches me perfectly.

My requirements for a foundation are medium to full coverage and it has to last about 10 hours without needing touch ups and this pretty much meets those requirements. It's definitely medium to full depending on how much you apply. However, a little does go a long way, which I appreciate since it is a more expensive product. I like to have a foundation that has coverage that is good enough to not need concealer on spots because I like to eliminate any step that I can and this product does that for me.

It does last all day as well, but I do start to see a little oil coming through on my nose half way through the day. I don't mind blotting once through the day, but I do not want to have to reapply any makeup or put on powder.

I like the finish of this product; I would say it's a satin finish, which is my favorite because it's not too dewy and not too matte so it looks really natural (especially because I don't need concealer). If you look at the picture of me on my birthday, this is the foundation that I'm wearing. It had been on about 4 hours at this point and it shows how it photographs.

As far as the packaging, the bottle is very nice, it's thick with the gold top that really adds to it's aesthetic. There is a no pump, which is a big thing for a lot of people. I don't mind not having a pump too much because I'm used to it with the Colorstay, so it's not a deal breaker for me to use.

Also, a side note about this product is that when deciding on a foundation to purchase, I wanted one that was paraben free. This one came up in the search on Sephora's website, but I'm unable to find it written anywhere. Anyway, I hope that it is because that went into my decision to purchase it. So if you try to stay away from anything with parabens, you should check this one out.

Overall, I'm very happy with this product. I'm sure that I'll repurchase it in the future because it is probably my favorite high end foundation that I've tried so far.

Let me know what you think if you have it!
Instagram Twitter Pinterest Google+ Image Map

Wednesday, December 9, 2015

Eggnog Loaf Recipe

Blogmas Day 9

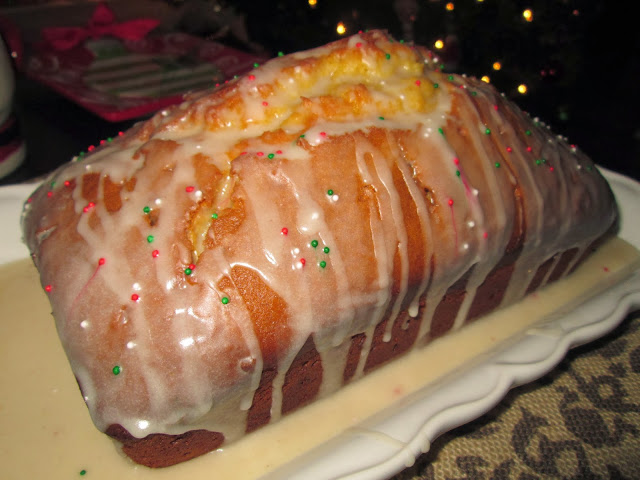
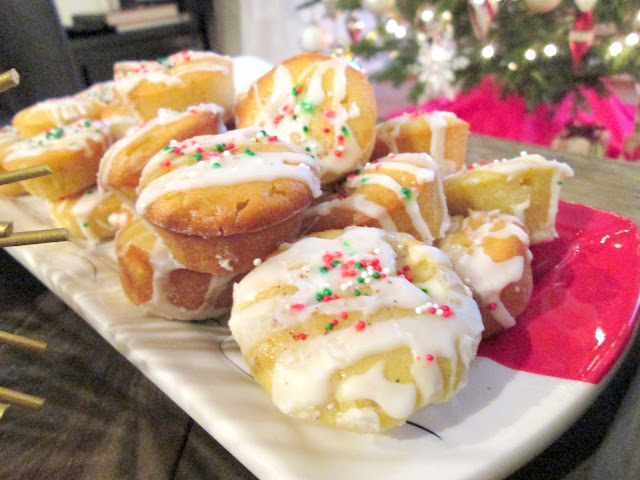
I posted this recipe 2 years ago, in 2013, but I love it so much that I wanted to share it with you all again! I have a holiday potluck at work today so I decided to use this recipe and make mini muffins because I had never done that before with this recipe. I took this full loaf to my holiday potluck last year and most of it didn't get eaten and I think it was because no one wanted to take the time to cut a slice and they probably didn't want a full slice, either, after eating a heavy lunch.

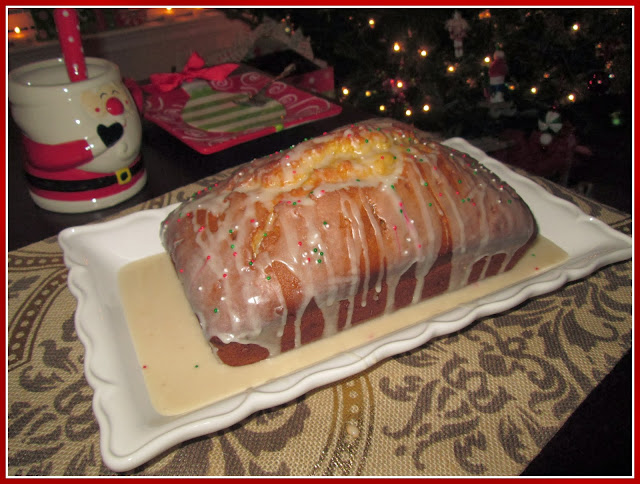
I think the mini muffin version of this recipe will be great for events like I'm having today but the full loaf itself is really gorgeous and is a really eye-catching dessert to have on the table. I particularly love making a full loaf because it's so versatile to have in the house for breakfast, dessert, snacks, etc.

Don't be deterred from this recipe if you don't like eggnog, because I'm not a fan of it, but I love this recipe!
Eggnog Loaf Christmas Recipe

Ingredients:
1 and 1/2 cups of regular eggnog (not low fat)
2 eggs
2 tsp Spiced Rum
1 cup white sugar
1 teaspoon vanilla extract
1/2 cup butter @ room temperature (I prefer margarine for this recipe)
2 1/4 cup all purpose flour
1 (3.4 ounces of powdered) package of instant French vanilla pudding mix
2 tsp baking powder
1/2 tsp salt
1/2 tsp ground nutmeg
*Note: You can substitute the Spiced Rum for Orange Juice 

Directions:
Preheat oven to 350. Spray your loaf, muffin etc. pan with non stick spray.


1. In your mixer using the paddle – mix together the eggs, eggnog, rum, sugar, vanilla and butter. The butter will remain clumpy but that is just fine. 

2. In a separate bowl, sift the flour, pudding mix, baking powder, salt and nutmeg.

3. Add the dry mixture to the wet and blend until incorporated. Avoid over mixing. Again, the butter will remain clumpy and this is to be expected. The butter will melt when cooking.  The dough will be thicker – be aware.  

4. Pour into your prepared choice of pan(s).

5. Bake your mini loaves or mini muffins for approximately 30 minutes or until a toothpick comes out clean. A regular loaf pan will take about 45-55 minutes. Mine always take closer to the hour mark, at least.

6. I suggest using a toothpick or preferably a skewer to poke holes in your loaf so the glaze will sink inside and it'll be nice and moist when you cut into it!

Glaze Ingredients
2  tablespoons of milk
1/2 tablespoon of eggnog
1/8 teaspoon nutmeg (I used a little less than this because I wanted the glaze to stay white)


Once you've whisked it all together, it should be thick and a creamy white. I also like to add festive sprinkles to mine to add a little color!

Eggnog Loaf Christmas Recipe

Eggnog Loaf Mini Bites Christmas Recipe


I hope you guys give it a try, you won't be disappointed!


*Original Recipe: http://kneadtocook.com/eggnog-bread/
Instagram Twitter Pinterest Google+ Image Map

Tuesday, December 8, 2015

Tanya Burr Advent Calendar Day #3

Blogmas Day 8


Day 3 (Day 5 for me) of the Tanya Burr Advent calendar was very exciting because it was a full size nail polish. It's in the color "Under the Sea" and it's a dark midnight blue with varying sizes of glitter in blues and greens. Once again, I really like the packaging, although it was a little hard to open, the shape of the bottle and the gold top make it look really nice.

I didn't have time to completely change my nail polish, but I did put it over my dark burgundy polish just to see how it would look and I thought the result was pretty. If you look at the tip of my nail, you can see where the burgundy polish had chipped off so that's a more true representation of the midnight blue base color.

I'll have to wait to see how it wears when I'm able to apply it properly, but I'm really excited that it was included in the calendar!
Instagram Twitter Pinterest Google+ Image Map
Related Posts Plugin for WordPress, Blogger...